Friday, October 29, 2010

Schwinn Continental Part 3

Hello and Welcome, I hope everyone got through the storm OK. We were very fortunate. The power here never went out. And the Oak trees shed very little lumber in the high winds. Here is my latest update on the Continental.
Left Click on Image to Enlarge. Back(<) Button to Return


Above: The front wheel finished and back on the bike sporting a new Kenda K35 Skin-Wall. Also front center-pull caliper refurbished with new Jag-Wire Shoes.


Above: The rear wheel cleaned-up nice. It took a while to "true-up" the wheel as several of the spokes were loose. I took this pic before I removed a few links from the chain. The rear derailleur cleaned up nice. It took a little longer than usual as I was out of White-Lightning Clean-Streak. I used Q-tips to get at all the little nooks and crannys. I did use some Green Bio-Degradable de-greaser along with mothers (Mag and Aluminum Polish) and Turtle-Wax (Chrome cleaner/Polish). In the end I think it came out just as clean. I used the very last of the Clean-Streak on the free-wheel. I gave it a good scraping and brushing (between the gears)before spraying.

Above: Here the bike is starting to take shape. I did end-up changing the handlebars. The Fuji bars were a little too small of a diameter. I can`t imagine anyone riding this monster having small hands. So I robbed Peter (La-Tour) to pay Paul (Continental). So now it is sporting a sweet set of light weight Road-Champions. (pic coming soon) As you can see it still has the temporary saddle.
The new Saddle was delivered late today with the new brake-lever hoods.

Above: The pedals on the Continental were cheap replacements, and did not even match 100%. So I took these pedals from the Varsity`s parts box (which appear to be Continental upgrades) and refurbished them. I used every thing to clean them up.
This would include a Brass-brush and a Brass Power brush, Turtle-Wax Chrome Cleaner/Polish/Rust-Remover and Mother`s Mag and Aluminum Polish. I did see a beautiful 1980 Continental on you-tube. The restorer listed Mother`s as his Chrome Polish of choice. And the chrome looked fantastic. I have been using Turtle-Wax Chrome Cleaner Polish since the 1970`s on cars and motorcycles. Maybe it is time for a change.


Above: A close-up of the "Schwinn Approved" rear derailleur. Sounds kind of silly now SCHWINN APPROVED! But back in the day, that really meant something. Because before the light-weights, Schwinn ruled the roads of America.


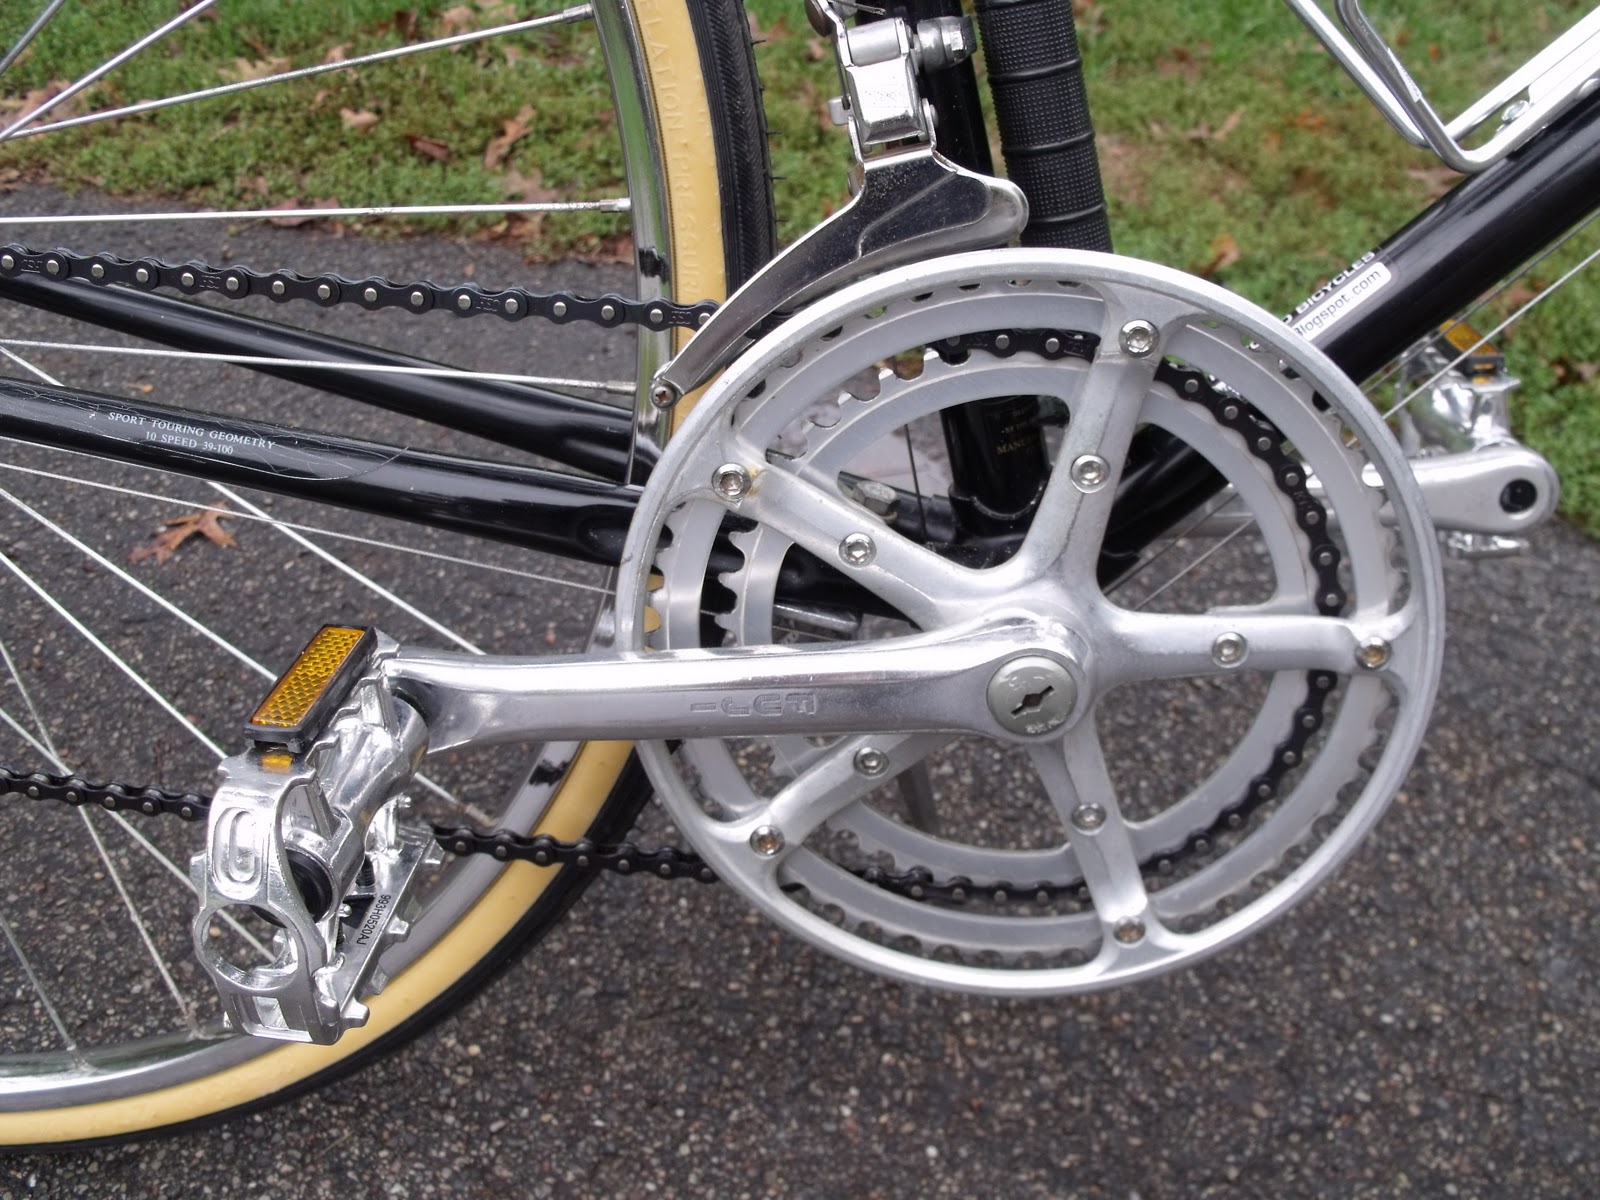
Above; The front derailleur all cleaned up and ready to go to town! I don`t about you but.. I just cant get enough of that "Schwinn Approved" engraving (:


Above: Here is a shot of those Phat Road-Champion bars. I think that was a good switch. Also a shot of the rear brake-lever with a new Cane-Creek hood installed.
Of course the suicide levers were removed earlier and the mount post cut-off almost flush with the lever frame or body. I think I`m going to do a post (soon) about making these hoods work with the standard Continental levers.


Well, That`s about it for tonight. I will be finishing this bike tomorrow. Actually it`s almost done now. But I did not want to take any more pics till the new cork tape is on. So check back soon, I think you are going to like the way it turned out. In the mean time, Ride Safe and remember to always RESCUE,RESTORE&RECYCLE Cheers,Hugh

Thursday, October 21, 2010

Schwinn Deja Vu Continental Update

Left Click on Image to Enlarge. Back(<)Button to Return


Above: The One Piece "Ashtabula" Crank before refurbishing

Above: I removed the Ashtabula 1 Piece Crank and de greased the bearings and cleaned and polished the cups. I lightly sanded the cups with # 600 automotive wet-sanding paper before re-polishing. I removed the ring-guard and large chain-ring for brass brushing and polishing with Turtle-Wax Chrome Cleaner Polish & Rust Remover.


Above: The fork had lots of surface rust and the sticker (graphics) were peeling off. I was a little concerned that it might not clean-up well. The lower head-set bearings had no grease what-so-ever and barely a trace that there ever was any.
I did notice the tires appeared to be original and still had plenty of tread. This tells me the bike was not ridden much and the bearings would probably be ok after a good soaking. I used white-Lightning Clean-Streak" on the head-set bearings. Quick Tip: After I dry-off the bearings, I like to shake them. If I don`t hear the bearings rattling around in the jacket, I know they are not clean yet. Be careful that they are completely dry and wear safety glasses. You do not want to get de greaser in your eyes.


Above: The fork after cleaning and polishing. I was able to peel-off the stickers by hand with a little help from a razor blade. Next I used Goo-Gone to remove the adhesive residue from the stickers. After that I went over the fork and crown with Turtle-Wax Chrome Cleaner Polish / Rust-Remover. After polishing I touched -up the bad spots with a Brass detail brush, then re-polished. I had to do that twice to get it this good.


Above: The original stem and shifters. The stem looks pretty good, it just needs a little cleaning and polishing. The shifters are very savable but just too bulky. I decided to replace them with some more compact Sun-Tour stem shifters. I will also be eliminating the suicide-Levers for the same reason. This will also allow me to install some vintage looking brake-lever hoods.


Above: The stem re-mounted after cleaning and polishing with the refurbished Sun-Tour stem shifters. The handlebars are FUJI NITTO engraved. The originals are on my MotoBecane Special Sport. If you enlarge the photo it looks like there is a little residue still on the bars from the original tape. What you are actually seeing is where the adhesive ate through the finish on the bars. I don`t think I have ever seen this before.(at least not this bad) The bars will be re-taped and it will not be visible, I`m not too concerned about it.


Above: This pic shows the original saddle. It will be replaced eventually with a much nicer brown racing saddle. The seat-post was in excellent condition. That is "no doubt" due to the fact that it has never seen the light of day (:


Above: This is not the saddle I am going to use. I just wanted to see how it would look. I did polish the post and collar (Turtle-Wax) and clean-up the seat mount hardware. I think this saddle will look good on the red Schwinn though.


Below: A few more self explanatory pics from the restoration


Till Next Time, Ride Safe and Remember to always RESCUE,RESTORE&RECYCLE
Cheers,Hugh

Thursday, October 14, 2010

Schwinn Continental Deja Vu

Left Click on Image to Enlarge, Back(<)Button to Return


Above: In the immortal words of Yogi Berra "It`s like Deja Vu all-over again". Some of you might remember that I posted a Continental almost identical to this one on 05-18-10. This is kind of a unique opportunity. You know how sometimes you finish a project and think, Maybe I should have done this or that differently? Well, I was just looking at photographs of the May Continental. I remember thinking of a few things I could have done differently.

Schwinn Continental posted  05 - 18 - 10


Above: In my opinion the hoods on the brake levers look fine. But natural cork tape or dark cork would look much better than the black. Also the saddle. I think the black/gray saddle looks ok... But, a brown Leather saddle would look 100% better. Now I might not be able to afford leather. But I CAN afford brown. As for the pedals, I`m good with the old style pedals with traps and straps. I would not want to make a change there. But the tires? On the May Continental done the way it was, black-walls would have looked better. But had I made the fore-mentioned changes, then the Gum-Walls would have been the way to go. So I will probably go with the gum-walls this time around. And I`m even considering fenders. Not the shorty`s it has now, but full touring /commuter fenders. I`m thinking the fenders I took off the Motobecane Special Sport might look real cool.


Above: This is pretty-much where I am at on the current Continental. I have cleaned-up the bearing races in the crank-housing. I won`t call it a bracket-shell because it is a one-piece crank and therefore does not have a bracket. I also cleaned-up the cups for the head-set bearings. And started to polish up the one piece crank. (oddly enough it is in three pieces)So I guess that makes it a "three-piece" One-Piece Crank (: I did place an order for tires. If they all show-up I will have three different tires to choose from.


Above: Here`s most of the stuff I stripped off the Continental. I do need to locate some handlebars. I have plenty laying around,I just have to decide which ones to use. There is a Le-Tour mixte awaiting restoration that has a sweet looking set of bars. I might borrow them for this project. I also need to get busy locating a saddle if I`m gonna go with brown or leather. I have the original levers with suicide levers. The suicide levers have blue plastic sparkle or flaked covers on them. God do they look stupid. I`ll have to cut the posts off the lever-frames to eliminate the suicide-levers. No problem there, since I`m gonna install gum-like hoods anyway. I wonder if I could find Aero-levers with gum hoods, that might look cool. I have lots to think about.


Above: The other Schwinn project is a Varsity. I have it stripped down to the frame
but I will not work on it till I have done all I can do on the Continental and am waiting for parts to arrive. That is the great advantage of having multiple work-stands. This makes it much easier to work on two bikes at the same time. I also have a third stand that breaks down easily to take in the truck for repairs. (and adjustments when delivering a bike) I have learned from experience to bring all the tools necessary to make any adjustment that may be needed for the customer.


Above is a photo I took while test-riding the Quantum. This canal is actually part of a larger canal system that runs through an older sub-division here. It`s like the Michigan version of Venice. I never noticed (or I forgot) it ran behind the VFW Hall till I rode back there on my bike. It`s true, you really do notice more when riding a bike. Well I think that`s all for now. I will post the progress on the two Schwinns as soon as there is some. Till Next Time, Ride Safe and remember to always RESCUE,RESTORE&RECYCLE. Cheers,Hugh

Saturday, October 9, 2010

Quantum vs100 Modified Dirt Road Racer

Left Click on Image to Enlarge, Back(<)Button to Return


Above: Looks like junior might have borrowed dads bike for some curb jumping. That was my first thought when I spotted this bike at a local Thrift Store.But other than the damaged wheel and some dried-out original tires, The bike actually appeared to me in excellent condition. And for what they were asking, I`ll take a chance that I have a matching wheel somewhere in the shop/garage. Turns out I did not. I ended up purchasing a Woman`s Raleigh M20 for the wheels and tires. It was not much of a bike, badly chipped paint and some rust, damaged grips ripped saddle, broken pedals. Well you get the picture. But somehow the wheels looked pretty good. And the Maxis off-road tires look Great! So for 10 bucks I took it home and promptly stripped it.

Above: Add a chain, two tires a spacer ( from the head-set) and a back wheel to this pile and you have pretty much all the things I replaced on the Quantum. Here`s why. A while back I spotted a "Ratty" looking rigid mountain bike sitting out side a thrift store. It had drop bars like a road bike. While it did look really rough, I could see what the builder was "going for". I thought to myself, I would like to build a "Road-Warrior" or "Street Fighter" type bike sometime. So that is what I decided to do with the Quantum. I figured, If it does not sell I`ll just keep it for my self. God knows we have plenty of crappy roads around here that I avoid on my road bike. This bike might be "just the ticket" for me.


Above: Another problem I encountered was the mounting bracket for the rear derailleur was bent inward. When I removed the derailleur for cleaning I laid the bracket part flat on the (anvil part) of my shop vise. Then a few good hits with the Ball Pien Hammer and it was fine. I got lucky, it was fine the first time I mounted it back on the bike. Sometimes it`s better to be lucky than smart (:


Above: One of my take-off stems was a perfect fit. I borrowed the cable-guide/adjuster off a parts bike. The old Dia Compe levers are also take-offs from an old project. It was no problem making the road-levers work with the cantilever brakes.I had to switch to road cables of course. I do however need to re-adjust the front brake. I opened-up the straddle cable a bit too much. I need to loosen the shoes, then tighten (or shorten-up) the straddle cable. Then re-set the shoes. It just does not look right, although it works fine. The Cinelli bar tape is new, as are the Jag-Wire cables and housings. I`m starting to "get comfortable" with this modern way of taping the bars.


Above: I found this Specialized Saddle at Cycle-Therapy in Waterford Mi. It was a take-off from a brand-new bike, so they gave me a good deal on it. Thanks James !
The seat-post was painted black. Instead of re-painting, I decided to sand it down.
Why re-paint? It`s just gonna get all scratched-up again from adjusting post height.
I really don`t see the point.


Above: I think these pedals are from the Fuji s10s project. I just cleaned them up and added new traps and straps. The other side is missing the dust cap, maybe they have one laying around the shop at Cycle Therapy? The rear mount kick-stand came with the bike. I did cut all the mounting screws down to a reasonable length. I think it fits this bike "kind of different" just like this bike.


Above: I found this really cool looking water-bottle cage at Meijer`s for about seven dollars. I`m thinking now I should have gotten a few more. Meijer`s is also the best place to buy Mothers Mag and Aluminum Polish. They also have the "Armor-All
Cleaning Wipes" way cheaper than any I have found at any of the local Auto-Parts Stores. Same goes for the Turtle-Wax Chrome-Cleaner-Polish / Rust Remover.


Above: The finished project! I haven`t really ridden it yet. ( my back has been bothering me ) I`m might ride it into town in the morning I`ll let you know how it goes. I did also install Sun-Tour stem-mounted shifters. This worked-out great as the braze ons (cable-guides) were already in the right position on the down-tube.
Well that`s about all there is for now. I will be missing the "Tour De Livingston" due to my back. Maybe I`ll just show-up for breakfast and to take some photographs. Always good to hang-out with my fellow cycle enthusiasts. Till Next Time, Ride Safe Remember to Always RESCUE,RESTORE & RECYCLE
Cheers, Hugh

Monday, October 4, 2010

The other Raleigh

Left Click on Image to Enlarge. Back(<)Button to Return


Above: This is the other Raleigh "Capri" (after restoration) I was referring to during the Raleigh Record restoration. It was a real disappointment the day I picked it up. Having seen it on Craigslist, and only in a small photograph. I expected it to look much better than it did. One thing about bikes is that "they photograph well" If you are considering purchasing a bike via the internet. If the photographs are small, You should demand that the owner send you bigger photographs. These should include "detail shots" of all the major components.

Above is the crank-set off the Fuji mixte. The pedals, water-bottle cage and chain are all new Schwinn. The front derailleur is from my stock of salvaged parts.
All the alloy including the crank, stem & brake calipers had been exposed so long the alloy had turned white. The chain was rusted into basically 1 piece. The chrome all had what I call "deep rust". After a while you become pretty good at grading rust. And the rust on this bike was about as bad as it gets. The derailleurs were beyond saving. In fact the only thing that looked worth saving was the frame. And I was not 100% sure about that. The paint was flat but "all there" for the most part. And the decals looked pretty good. I used Meguiar`s Cleaner Polish to bring the paint back to life. As for the paint chips I used black fingernail polish.

Above: The Handlebars (Raleigh USA engraved) are off the Raleigh donor bike that I bought for the wheels. (for the MotoBecane)And the Stem came off the Fuji mixte.The Zifal frame pump is a take-off from one of my recent projects. Notice the cable guide under the down tube.It has a front wheel lock or clip. This is also off the donor bike which was a woman`s "Pursuit" model. The wheel clip or lock is something I doubt you would ever see on a stock Capri. I just know I`m gonna get an e-mail or comment about the correct name for the wheel-clip/lock/brake. At least I hope I do. (: The Cork infused tape is Cinelli. And the brake-levers are also from my stock of salvaged parts. I think they are Dia-Compe "Regulars".


Above: The rear rack is off the Blue Schwinn Continental I restored a while back. The Avocet Saddle is off the MotoBecane "Special Sport". The used seat-post is from my stock. And the chrome collar-clamp bolt is also off the Pursuit. The rear brake
is a "Chang-Star" knock-off of the front Dia Compe side-pull caliper brake. Both from my stock of salvaged parts. As you can see, I tried to re-cycled as many re-conditioned parts as possible.


Above: The rear derailleur is also a re-conditioned Sun-Tour from my stock. And yes I did eventually trim the cable and put on a crimp-on cable tip.I also cleaned up the drop-out and removed a few chain links. The wheel-set is off another Raleigh Capri that came in for a wheel upgrade. And the owner was kind enough to donate the old wheels to the cause. The wheels got polished and trued and the axles and bearings were removed, de greased and re-built with new bearings for the front.


Above: There are some things I rarely (if ever) recycle. I always replace the tires
and inspect the inner-tubes. If the tube leaks or has been patched I discard it. The cables always get replaced. Cables are cheap. When ever I tried to re-use them (in the past) one would always snap. Not worth the aggravation or the risk. Best to replace them,if you can. And brake shoes, same story. Sure you can sand them and they might not squeak (for a while). But for the cost, (in bulk) better to replace them. And you CAN get decent brake shoes in bulk. I always use Jag-Wire shoes on the vintage road bikes "when possible." And I always re-build the head-set and bottom bracket. And inspect the cups carefully and replace them (and the bearings)if the cups are scored. Usually they are re-usable.


above: A better shot of the front wheel clip / lock / brake. lol One of those might be the correct name. Right Now I am building what I like to call a "Road Warrior". I have spotted a few these around and thought I would like to build one for myself.
Nice to do something different. That reminds me, I need to take some pics.
Till Next Time, Ride Safe and remember to always RESCUE,RESTORE&RECYCLE!
Cheers,Hugh
 
Cycling Blog Directory