Sunday, June 27, 2010

Fuji s10s a problem solved

The Fuji s10s is finally back "in-progress". I have done a little more work since this pic was taken. I am still waiting for the new saddle to arrive. Which by the way, will now be black. If the saddle does not show up soon I may break with policy and bad mouth the supplier on my blog. It took a week to find out it was on back order. Then two more weeks for them to NOT get it in stock. Then I finally contact them and I get "I was just gonna contact you" "We still can`t get the saddle in brown" (sigh) "We do now have it in black" "Would you like us to ship you the black version"? So I told them "Yes Please send the black one" What a load of crap! I ordered the bloody thing on the 6th of June. You would think after all that, They would have shipped the black one right away. No not these clueless wankers. I still haven`t received notice that it has been shipped. I wish they were in S.E. Mi. instead of on the west-coast. I would love to stop by and tell them where they can put "or shove" their @&% @#%$ saddle.

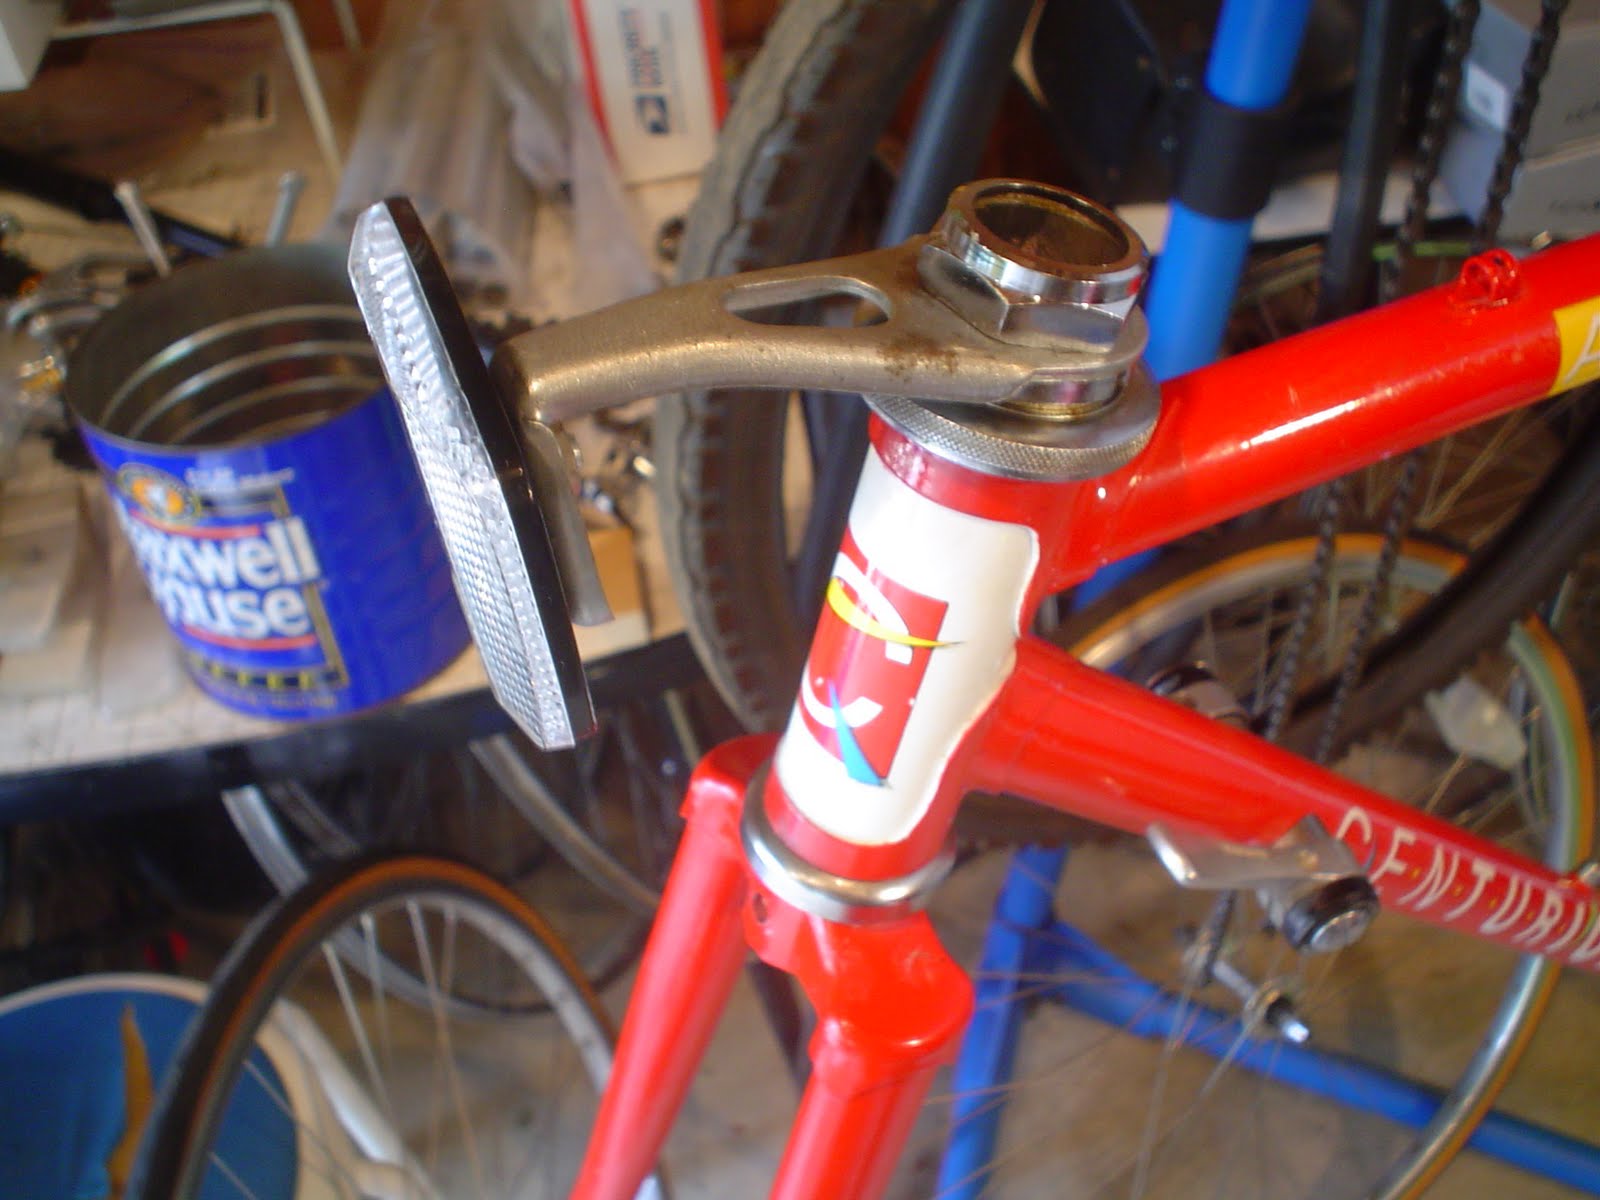
On a "happier note" (like that was happy) I have solved the "brake problem". I have refurbished the Dia Compe center pull brakes. Annnnd, I have installed them on the bike with Aero-Levers. I had an idea that I had been thinking about for a few weeks. On how to make center-pull brakes work with aero brake levers, (paticularly) on the front brake. The only one (center-pull front brake with aero lever) I saw a photograph of, did not look very good. The builder had to use an excessive amount of slack in the cable to make the semi-straight connection to the front brake. Which basically took away a bunch of the aeroness. Defeating the whole purpose of installing them in the first place. This is my solution to the problem.


I would like to take this opportunity to apologize for not posting sooner. I have been busy with the house (roof, siding and tree trimming). And it has been very muggy here, which has been kick`n my asthmatic butt. But we have a big cool-down coming and I should be getting more time and energy to work on the bikes. (:
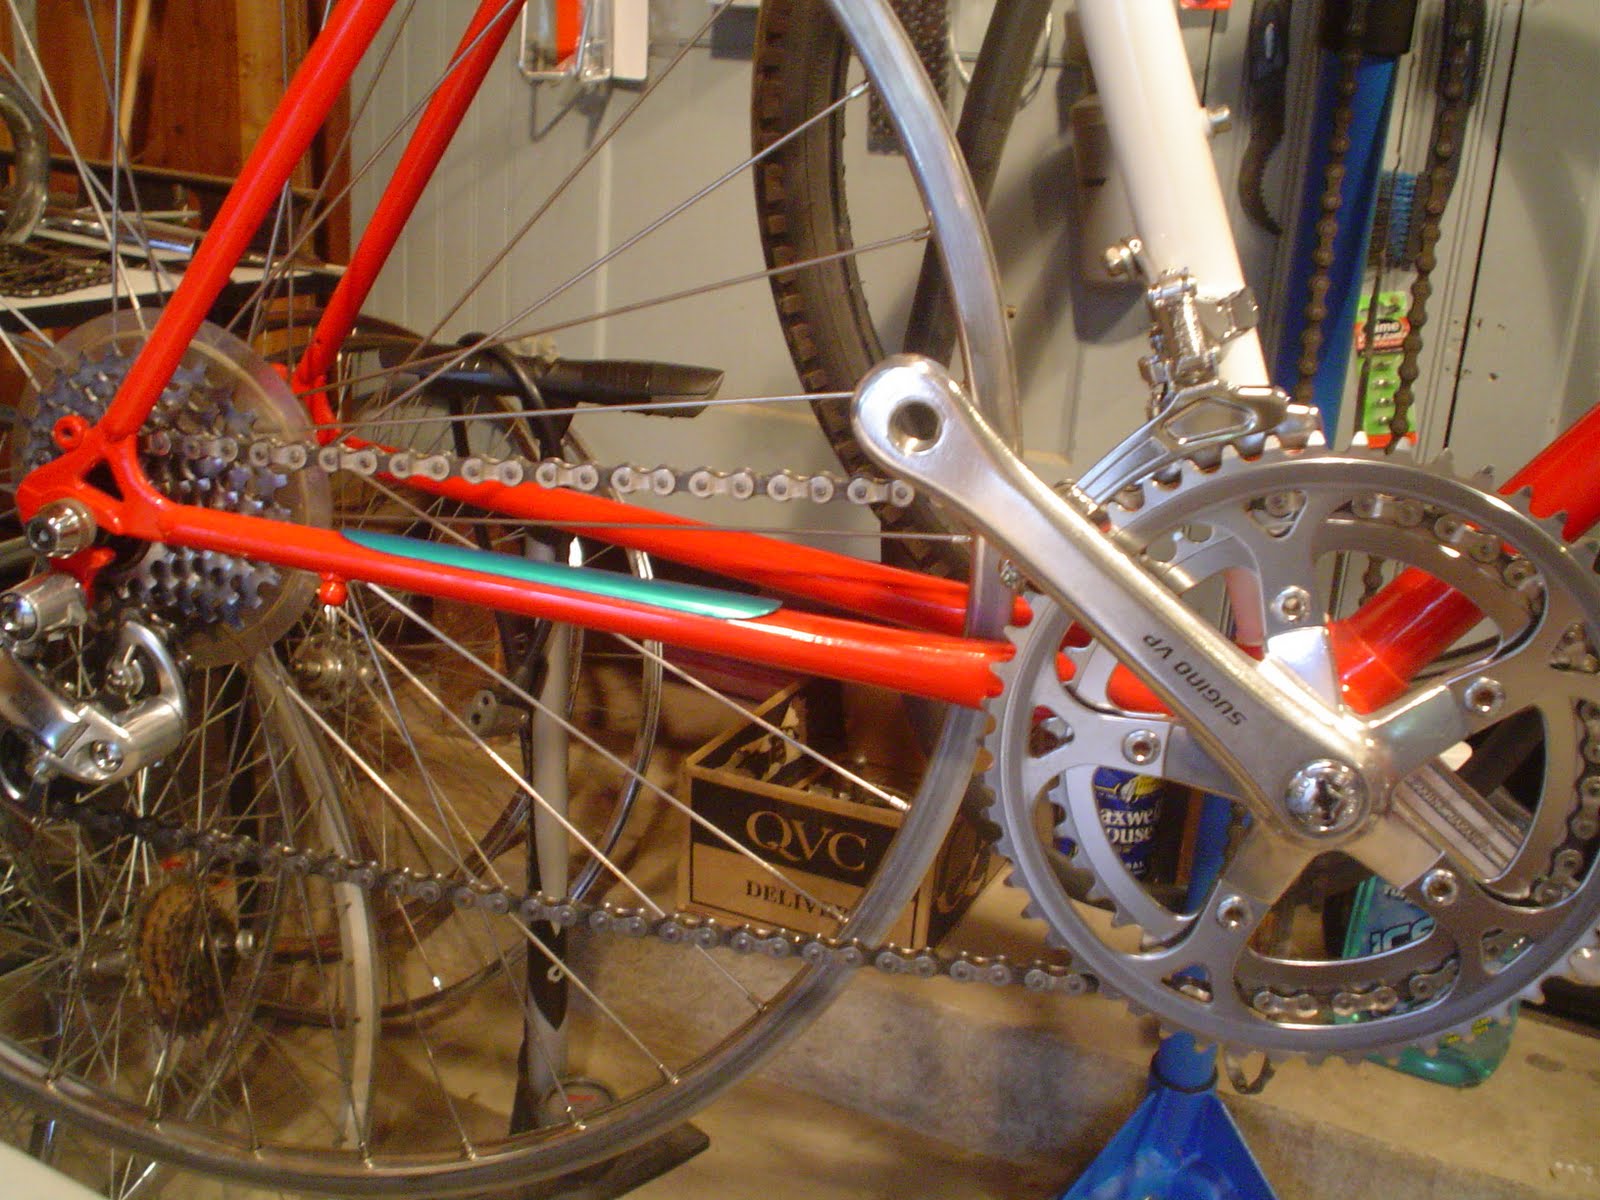
That about wraps it up for now. Below is a photo showing the difference between the refurbished and polished caliper and the untouched caliper. As usual I used Mother's Mag and Aluminum Polish and a Brass Brush
Till Next Time...RIDE SAFE and Remember to always RESCUE,RESTORE&RECYCLE
Cheers,Hugh

Friday, June 18, 2010

Fuji S10S Restoration Progress

Hello and Welcome,
It was very hot and extremely humid here today. I did not get as much done as I would have liked to. But enough with excuses, lets get on with it :)

I managed to finish cleaning up the wheels, hubs and 5 speed free wheel. As well as truing both wheels on the truing stand. The bloody free wheel would not break loose. When I removed the quick release skewer I could see the probable cause of the frozen free wheel. There was absolutely no trace of grease on the skewer or remnants that would have indicated there ever was any. So I`m guessing that the free wheel was mounted without first lightly greasing the threads. There is a good thing to remember " bicycle assembly grease". Always lightly grease the threads before screwing on the free wheel. The Sun Tour free wheel would not budge. Had I put anymore torque into it, I would have bent something. Now before you start thinking that maybe I was not strong enough to break it loose. Let me remind you that I am a Journeyman Mason / Mason Contractor recently retired. I can turn a wrench as hard as I need to. Anyway, I ended cleaning it up "in place". I Used White-Lightning Clean-Streak and my Park Tool bicycle brushes. After wards I was able to lube the free wheel by holding the wheel drive side up. Then while spinning the free wheel just adding few drops of oil in the gap where the free wheel spins on it`s axis. I did this one drop of oil at a time maybe 5 or 6 drops all together. Making sure to wipe the oil off the exterior each time. It worked fine. The free wheel is not binding at all. It`as smooth as it could be. The bugger is, I was not able to remove the pie plate. Cleaning the back side of the pie-plate is a pain with it in place. Fortunately this one is in pretty fair shape on the back side. I will probably break-out the Q-Tips and Turtle Wax Chrome Polish/Rust Remover before it`s over. As you can see I did manage to get the tires mounted. Due to a defective valve stem I had to do the front one twice. Then I thought I would mount the new Tek Tro side pull caliper brakes. Of course they don`t fit. So now I have to decide if I`m going to re-drill the mounting holes. Or rebuild and polish the original center-pull brakes. Yeah this day just kept getting better and better..lol. At this point the heat and humidity was getting unbearable for this native northerner. I was about to throw the whole mess in the road and take-up drinking again! Instead I decided to call it a day, and put the tools away. I also took a few pics of a "department store" girls bike that I just fixed-up. And I did manage straightened-up the shop a little.
So Sunday is Fathers Day (: My Wife and Son got me a new Campbell Hausfeld air compressor for the shop! It will also be a sad day remembering my own Father who passed-away Dec 2008. And my "Father in Law" who passed away May 2009. They were both good men. Two old soldiers who survived World War Two.
That`s all I got for now. I will probably do some work in the shop early tomorrow before it "heats-up." Sunday is all family stuff. I think it will be cooler by Monday. Maybe I will know what I`m going to do about the brakes by then. Till next time RIDE SAFE and "stay hydrated" and remember to always RESCUE,RESTORE & RECYCLE
Cheers,Hugh

Tuesday, June 15, 2010

Centurion Accordo RS Finished

Hello and Welcome, I`m a little lost with this new format so please bare with me. Here is the Accordo RS finished.

I put the finishing touches on the Centurion Monday morning. I am very pleased with the finished product. Originally I was going to get rid of the white handlebar tape and matching hoods. My plan was to go with natural cork tape, gum hoods and a Brooks Leather Saddle. Or a leather like knock-off anyway. For some reason I decided to see how the white hoods would clean up. When I saw how nice they were coming out using just Armor All Cleaning Wipes my plan totally changed. .

I started to warm up to the idea of not only staying with the white handlebar tape but also going with the white saddle. Looking at the beautiful original red and white paint job, I thought "this is gonna look awesome" I did not go with the classic gum-wall tires. This bike needed some racy looking black tires with good graphics. The CST Compressor fit the bill perfectly.

The only thing I have considered changing is the pedals. But these (Dimension I think)pedals are very close to the originals. And their racy look and black color compliments the tires nicely. I do have a set of the Shimano 105 Pedals "knock-offs" but I think I am going to use them on the Fuji S10S.

Below: Here are a few more pics of the Centurion RS
All the things I decided not to do on the Centurion I am going to do on the Fuji. Except maybe the tires. I have rebuilt the threaded headset and 2 speed crankset. And have started working on the front wheel.

I just found out the spoon saddle for the Fuji will not be shipped till June 20th. That really sucks I wish they would have showed it "out of stock when" I first ordered it. I did not find out till I checked the shipping status. I was gonna give them a call and say some things I would have regretted latter. But after a good nights sleep I decided to just wait for the saddle. This was my first order with this company. Next time I will check the shipping status right away. Then I can just cancel if the wait is too long.

Before I sign-off. My Uncle Tim called the other day from a garage sale. He found a classic 10 Speed road bike He thought I might be interested in. I was very interested so he purchased it for me. And He even negotiated a great price for the bike! The bike will be a first for me a RAMPAR "RAPEDE". I think RAMPAR might be connected to Raleigh, but not sure about the details yet. My uncle will be in this part of the state July 2nd. And I can`t wait to see this thing and start making plans for it.

I will be updating the Fuji S10S project real soon. Till next time RIDE SAFE and as always please remember to RESCUE, RESTORE&RECYCLE
Cheers,Hugh

Friday, June 11, 2010

Raleigh Technium finished & Ross Hi-Tech refurbished

Below: The Raleigh at the end of day one. It came in with both derailleurs hanging off the frame and the back-wheel removed. The chain was a mess So I just cut it off and tossed it. To free-up the dangling derailleurs I just cut the rusty cables. Unfortunately the mounting hardware was missing for the Shimano Deore front Derailleur. After pumping up the tires I could see the nylon side walls were failing. Too bad as they had almost no tread wear.

Below: This was originally a triple chain-ring. The smallest chain-ring was disconnected and mangled and just bouncing around on the bracket shell. I removed the crank for cleaning and discarded the damaged small ring. As you can see the rest of the Shimano Bio-Pace chain-ring cleaned-up nicely.(with Mothers Mag and Aluminum Polish of course)

Below: The original Shimano Deore rear derailleur cleaned up great. And after re-mounting and installing a new Jag Wire Basics shift cable it is looking and working great.

Below: I was unable to locate the mounting hardware for the original Shimano Deore front derailleur. I did however find this Shimano Deore LX derailleur "on sale". You will notice it is mounted a little higher than usual. This is to make room for the egg-shaped Shimano Bio-Pace crank/chain-ring.

Below: Here it is finished (except a little paint chip touch-up)sporting a new set of Kenda Kinetics (tires). Hey, Wasn`t I going to do a post about paint touch-ups? This would be a nice one to use, as the nicks will show-up good against the white paint job.I will try real hard to remember to do that tomorrow. I should mention that this bike has a "bonded" frame. It is not a "brazed" lugged or welded frame. The fittings are bonded together with epoxy. As far as I know this is the first bonded-frame bike that I have ever owned or worked on. Pretty cool stuff!

Part 2
Below: I refurbished my friend Don`s Ross "Hi Tech" rigid mountain bike. The tires had no noticeable tread wear. But the "Gum" side-walls were all dried-out and badly cracked. When Don told me He had a "Hi-Tech Ross" that needed a tune-up and
tires, Well this is not the bike I envisioned. I did not realize that Hi-Tech was the model name. And that this is actually a very "old-tech" mountain bike. Also the words "tune-up" do not imply a frozen front derailleur. Or a free-wheel that is just barely free. Or cables so rusty that one section was tossed with the cable still stuck inside the cover.Fortunately I had saved some identical clear cable covers from another build. Also one of the jockey wheels was barely movable by hand. Yeah, it needs a tune-up alright!..... lol.

Below: The tires I borrowed off a donor bike, they give this bike a whole new look.
It had the typical 26 X 1.95 on /off road 1980`s tires.(identical to the tires in the first pic of the Technium) Mostly this bike just needed lots of cleaning and TLC. I did replace the Ross plastic mount saddle with a similar better quality used saddle with actual rails. I though it odd that Ross would not "fully commit" to building a quality mountain bike. The saddle mount was not even good for a department store bike. Also the kick stand was what you would expect to find on a very cheap department store bike. I replaced it with a "good quality" vintage alloy kick stand.

Below: A nice shot of the Ross all cleaned(1 & 1/2 half cans of Clean Streak) and polished. Unfortunately I was not able to see Don`s reaction to the bike. And I can`t wait to see his reaction when he sees the bill...lol Maybe I can wait for that! :)

These were two of the three bikes that kept me from working on the Centurion and the Fuji most of this week. Although I did manage to almost finish the Centurion this afternoon. It just needs cork-tape and a few adjustments and it`s finished. Also the roofers were making lots of noise this week (directly above me for what seemed like most of the time) I`m glad they are here, But DAMN they are noisy! So tomorrow with a little luck I will finish the Centurion and dive into the Fuji S10S. Till next time please "Ride Safe" and remember to always RESCUE-RESTORE& RECYCLE. Cheers,Hugh

Tuesday, June 8, 2010

Around the shop this week

Left Click image to enlarge, Back button (<) to return

Above: I started working on the Fuji S10S while waiting for parts fot the Centurion

Above; I found this little collapsible and adjustable table at the local Walgreeens. It makes a perfect platform for my truing stand and is fairly portable.

Above: After thinking about it for a couple of years I finally purchased a set of metric Gear Wrenches (ratcheting). The set did not come with a 9mm. However the store
(Peters TrueValue Hardware,Highland Mi)ordered one for me yesterday. They are great! If you are thinking about getting a set. I highly recommend them. These don`t have a lever, you just flip the wrench over to reverse rotation.

Above:The tires,saddle and pedals for the Centurion arrived yesterday. But I have been side-tracked by a tune-up that turned out to be a "major over-haul". Also a repair on a department store bike. And the new roof is going on this week and the noise is very distracting. But it is going well so far, and looks nice too.

Above: This is a very cheap way to clean parts that are not too bad. I think the pot and strainer cost about $7.00 (each). I just stuff some dirty paper towels in the pot and dump it in the trash when finished. The cleaner evaporates, so it isn`t really messy at all. You definitely want to do this out doors!

Above: This Raleigh Technium (probably spelled that wrong) was donated a few days ago. I have it cleaned-up and working. I ordered new tires for it and a new front derailleur. It is aluminum with Shimano Diore derailleurs and a Shimano BioPace crank. This bike is fantastic. I`ll take some pics when it is 100% and probably do a post about it. With a shock-fork this thing could be awsome!
Well that`s whats going on this week. I hope to finish the over haul today and get back into the Centurion or the Raleigh today. Till next time Ride Safe and remember to always RESCUE - RESTORE & RECYCLE!
Cheers, Hugh

Friday, June 4, 2010

Centurion Accordo RS Update

Left Click Image to Enlarge, Back Button to Return

Above: Using my Hozan Lock ring Tool on Headset. I don`t know why I did not get one of these sooner. And No, I did not take the threaded headset completely apart until after I removed the front wheel.

Above: After cleaning, polishing & brushing there is still a bad spot on the reflector mount bracket. I will have to "touch it up" remove it or replace it.

Above: I have to stop touching those white road brake lever hoods! I have already cleaned them up twice. The adhesive on these bars was not too bad. The Goo-Gone jell removed it with a little bit of elbow grease.

Above: The Rear Derailleur cleaned up easily with a little White Lightning Clean-Streak. Then I hit it with just a wee-bit of Mothers.

Above: The Front Derailleur got the same treatment. Except I used "Turtle Wax Chrome Polish & Rust Remover". It is chrome plated not alloy.

Above: The Shimano Road Brakes I hit with a little "Clean-Streak". And then Polished it with Mothers Mag and Aluminum Polish

Above: The Rear Shimano Caliper Brake received the exact same treatment as the front. I removed the calipers for cleaning but did not take them apart. They just did not need that much attention. I honestly can`t see any difference In the results. They were not very dirty. Normally I would take the calipers completely apart and polish them with Mothers Mag and Aluminum Polish.

Above: I cleaned the Chain and Free Wheel with White Lightning Clean Streak The rims may "look like chrome" but they are actually polished alloy. The Hubs and Rims were polished with Mothers. The Spokes just got wiped down with Armor All Cleaning Wipes (disposable). The original tires were a real tight fit. I warmed-up the rear tire with the heat gun before removing it. It seemed to help a little. I also trued both wheels after removing the tires.

Above: The micro adjust seatpost also got the Mothers treatment. I had to go-over it a few times. That`s typical as these rarely ever get touched or cleaned.It took some patience, but it eventually polished-up pretty good.

Above: It is now ready for new Brake Shoes and Cables. The Derailleurs are ready for new Cables too. Once those are done work will stop till the new Saddle and Handlebar tape arrive. I will most likely start taking the Fuji apart, and get the parts ordered. I do have a few minute nicks in the paint to touch-up. Here is a QUICK-TIP Fingernail Polish is excellent for touching up small nicks in the paint. And it comes in most of the basic colors. I have gotten a few "strange looks" while rummaging through the fingernail polish at the drug-store. Also small bottles of modeling paint work well too. If anyone knows where I can find modeling paint let me know. I think Testor`s was the name of the brand I used when I was doing model cars years ago in the 1960`s. Well it is almost noon 06-05-10. I started this last night but I was exhausted and gave up and went to bed. Now I need to "get to work" routing those those cables and and adjusting (if needed) the derailleurs. Till next time RIDE SAFE and remember to always RESCUE, RESTORE & RECYCLE! Cheers,Hugh

Thursday, June 3, 2010

Centurion Accordo RS Rebuild


Above: My current project a 51cm Centurion Accordo RS. This is my first Centurion road bike, unless I`m having another "senior moment." It reminds me a great deal of the KHS Triathlete I did a while back. Very similar components and compact frame.

Above: Someone asked recently how to loosen the road brake lever constricting clamp. I think I explained it pretty good. But here is a look inside anyway. The top circle you see in there is the end of the cable. Just below that is the Allen head bolt. Sometimes it is a slotted screw head. But it would be in the same spot.

Above: One or two turns counter-clockwise with the Allen wrench or Screw driver. And it should be easy to remove or re-position the lever. Note: A T Handle Allen wrench is easier to use than the standard Allen wrench.

Above: This is pretty much everything I removed from the frame except the tires and 700c wheelset. I like to keep it some-what organized. The white Formica keeps everything clean and easy to see.

Above: Removing the crank arm dust cap to access the nut that holds the crank firmly onto the bracket end or spline. Once the cap is loosened it is easier to just take it off by hand. UPDATE: Use a Penny instead of a large screwdriver to remove the dust caps. You can clamp on to the penny with pliers to unscrew the cap if necessary.

Above: The bottom bracket reassembled after a good cleaning and re-greasing.You want it tight enough so that you don`t feel any play. But loose enough that it does not grind. I had to re-adjust this one to get it just right.

Above: I removed the 2 speed crankset so I could give it a good cleaning and polishing. As I have said before, It`s really the only way to get it cleaned up 100%. I did get a little more done today but no pics yet. I will take some more pics tomorrow and update Friday or Saturday. Below is a preview of my next project. It was donated by my Uncle Tim and Aunt Cathie. Thanks Guys :) You Rock!

I`m too tired to proof-read this tonight. So please forgive the mistakes. I`ll fix them latter. Till next time Ride Safe and remember to always RESCUE,RESTORE & RECYCLE
Cheers,Hugh
 
Cycling Blog Directory